Matrix
Matrix is an open ecosystem empowering secure and privacy-respecting end-to-end-encrypted chats between individuals and groups.
Its federated architecture allows anyone to provide a homeserver, a place where your account and data lives; somewhat analog to a provider of e-mail accounts. If your account is on a homeserver which is federated—i.e. connected to the greater network of other Matrix homeservers—you can communicate with users on those other homeservers as well.
digital-hub.sh provides such a federated homeserver, the use of which is already included in your membership. This page will explain how you can log in using your digital-hub.sh SSO account.
tl;dr:
If you’re already a seasoned Matrix user, here’s the long and short of it:
Homeserver:
chat.digital-hub.shCredentials: Log in with your digital-hub.sh account via SSO.
Our homeserver is federated—if you already have a Matrix account on another homeserver, you can simply continue to use it in order to talk to other digital-hub.sh users.
How to use your digital-hub.sh SSO account with Matrix
This guide shows the login process with the canonical Matrix web client, Element Web.
Note
Element Web is the recommended client of choice for first-time Matrix users, but it is far from the only option available. For example, there is also a Desktop version—the instructions listed here are the same.
Besides Element, there are also several other excellent clients for you to try. Each offers a comparable feature set, but you will have to slightly adapt the instructions to the client you choose, as the interfaces will slightly differ between each.
First, launch the Element Web app in your web browser. You will be greeted by a screen similar to the following:
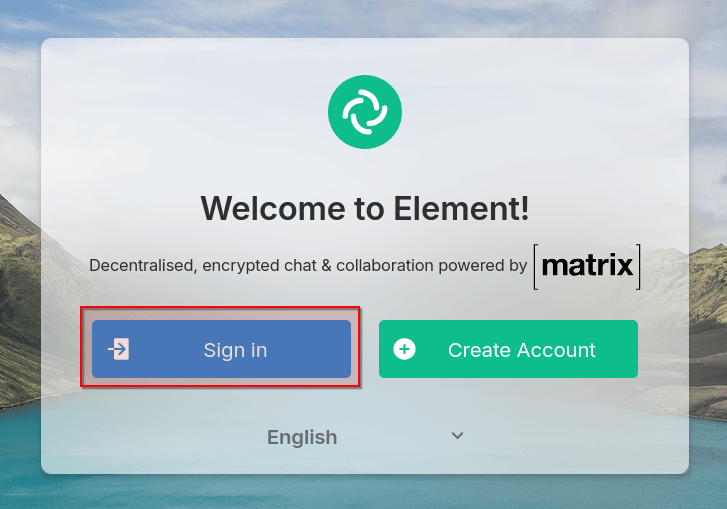
Change the app language if you desire, then click on Sign in. Next, Element will ask you to choose a homeserver to log into:
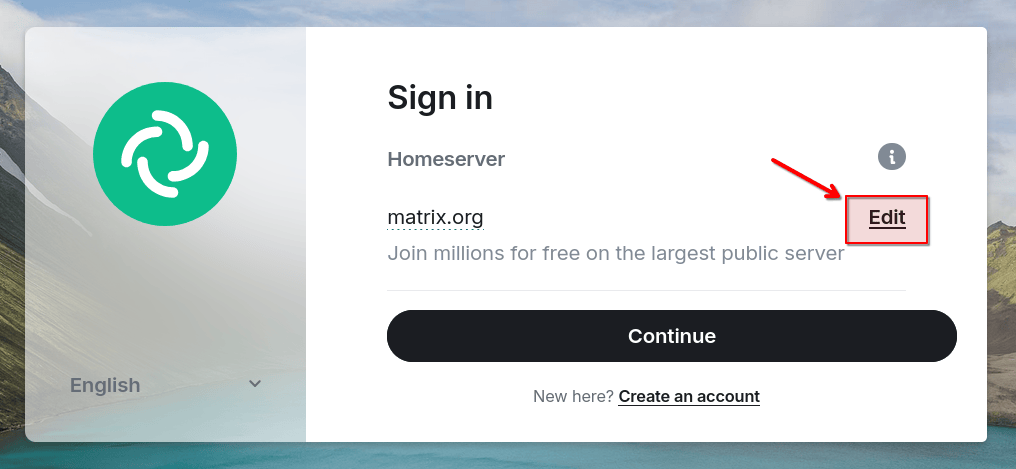
The default choice, matrix.org, is a public homeserver run by the Matrix.org Foundation. We are going to change it by clicking on Edit.
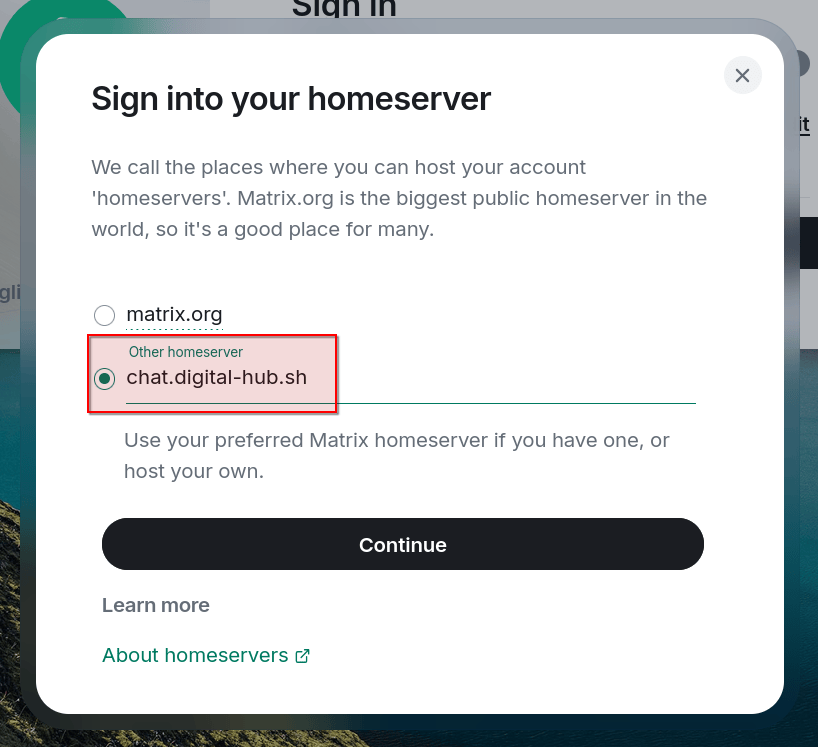
Here, in the text field below Other homeserver, enter the address of the digital-hub.sh homeserver, chat.digital-hub.sh. Click on Continue and you’ll be brought back to the login view:
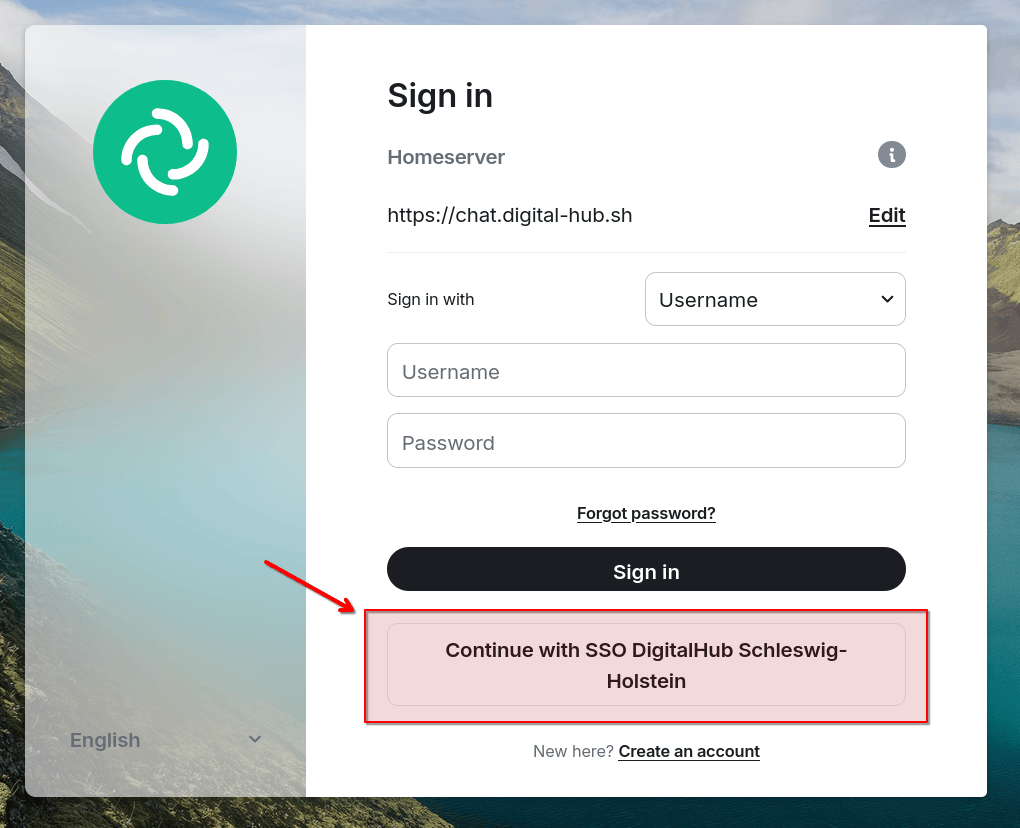
Your homeserver is now set to the digital-hub.sh instance, which allows the use of the Continue with SSO DigitalHub Schleswig-Holstein button. Click on it to proceed to login with your digital-hub.sh SSO account.
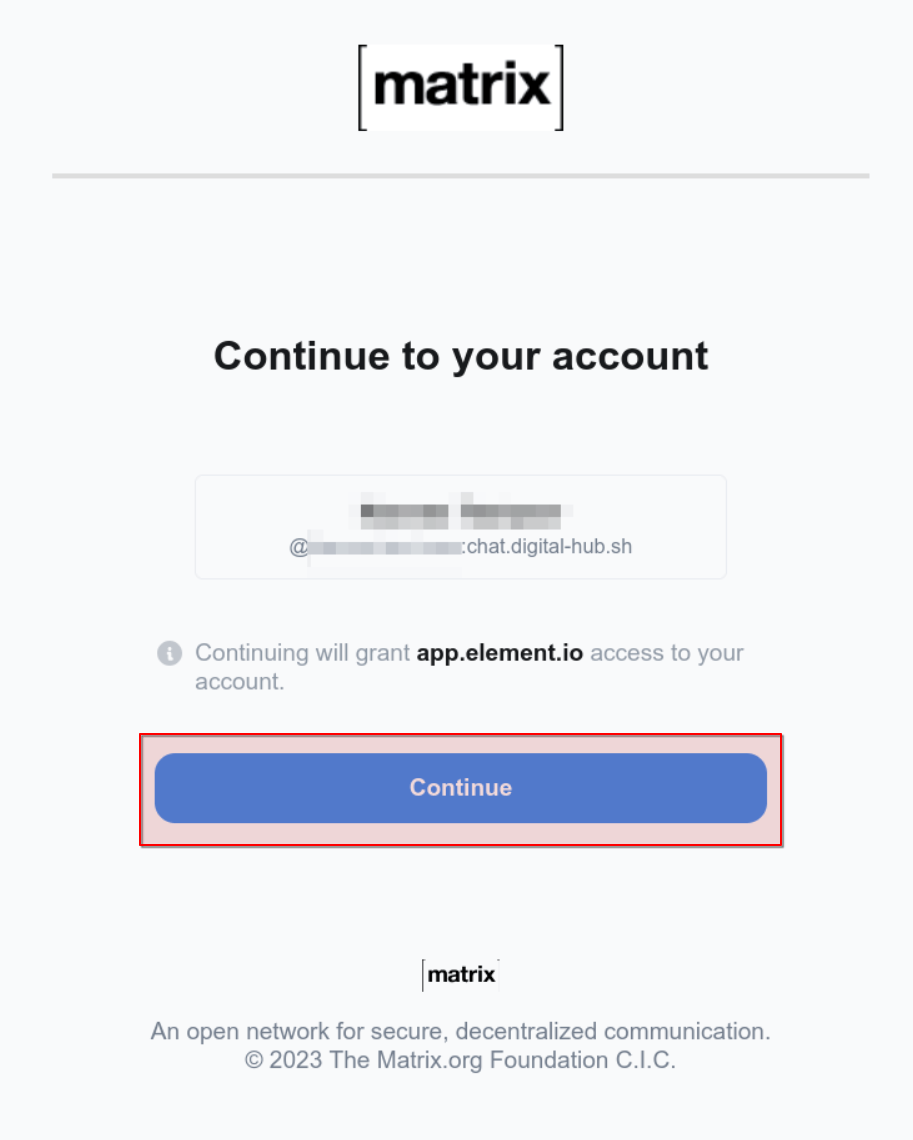
After performing the login with your credentials, finally confirm to connect your digital-hub.sh account with Matrix by clicking on Continue. That’s it—you have finished logging in and can start using Matrix to chat with your team!
Creating an encryption recovery key
Warning
This step is not mandatory but highly recommended if you plan to use end-to-end-encryption on Matrix.
Matrix supports end-to-end-encrypted chats, in both 1:1 as well as group rooms. Participating in encrypted conversations requires the participating clients to store encryption keys. Explaining the whole system is out of the scope for this guide[1], but the important takeaway is that you need access to the keys if you want to be able to decrypt older messages.
This is mostly important to keep in mind if you’re going to use more than a single client at once, e.g. if you use two different devices—like a computer and a mobile phone—or if you happen to lose access to all of your clients, like through a clean re-installation with no user-data backup. Once you lose access to your old keys, you will not be able to decrypt past messages (sent and received) any longer—they will be permanently lost.
This may sound inconvenient at first, but the Matrix specifications contain multiple ways to aid you in ensuring that you won’t permanently lose your keys:
Sharing keys between clients. When you log in with your second client for the first time, you’ll be given the option to verify it with your first client. This will also share the encryption keys between them. Ensure that your first client remains online while you start the second one, and the client(s) will guide you through the process automatically.
Setting up key storage and a recovery key. Your encryption keys can additionally also be stored on the digital-hub.sh homeserver as well—in encrypted form, of course. That way, even if you lose access to all of your clients, you can still regain a backup of your encryption keys. In order to securely access this backup, however, you will need a backup master recovery key, which your client will generate for you.
To prevent you from permanently losing access to your encryption keys—and your message history along with them—it is therefore highly recommended that you enable key storage alongside creating a backup recovery key. This is how you do it in Element:
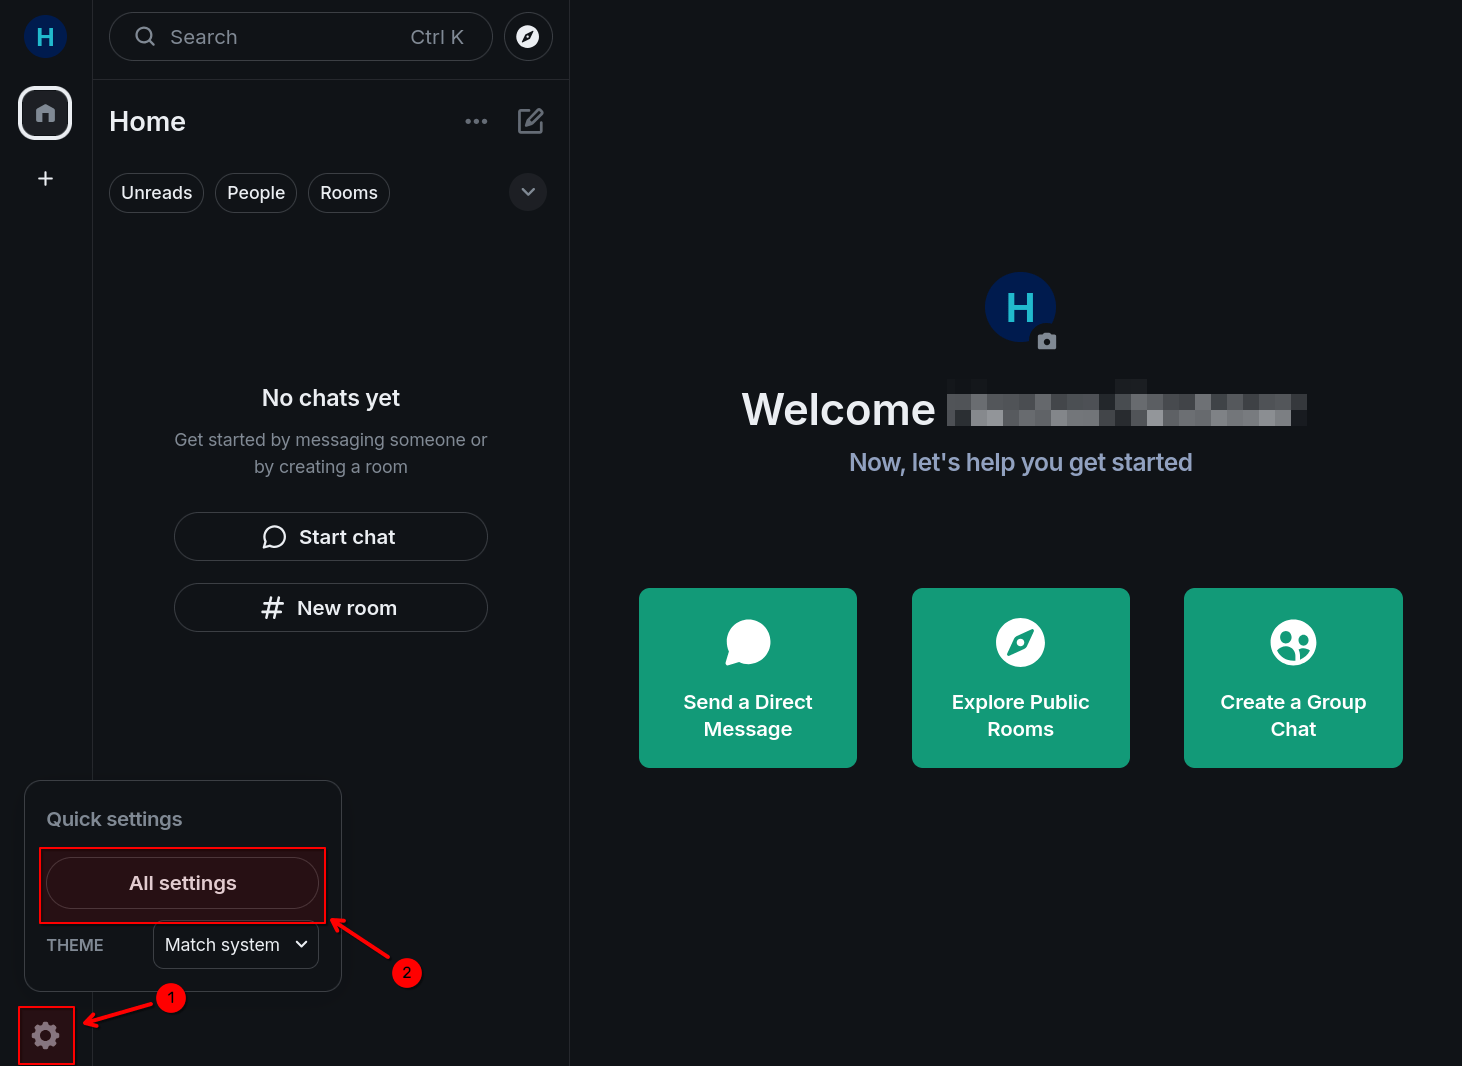
First, click on the Settings widget (1) in the lower left corner, then on All settings (2):
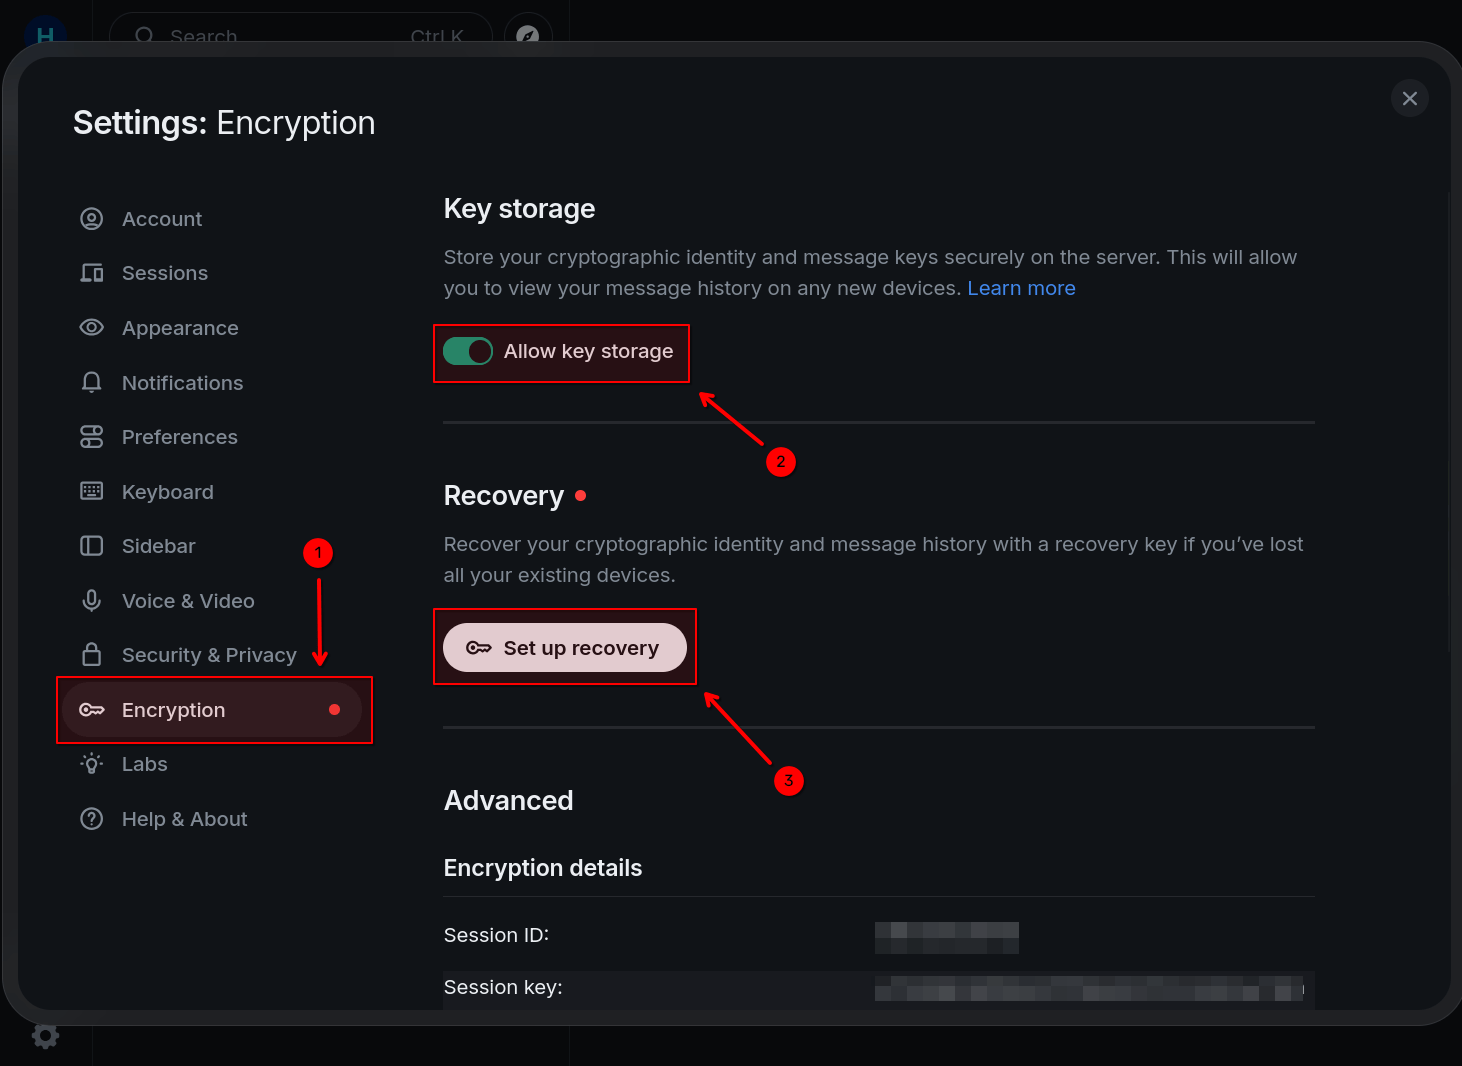
You’ll see the main settings dialog, where you’ll want to navigate to Encryption (1):
Note
The red dot next to the Encryption tab shows that you haven’t set up a recovery key yet. Don’t worry—this is what we’re here to fix for!
Here, first ensure that the Allow key storage option is enabled (2) so that your encryption keys can be stored on the digital-hub.sh homeserver, which allows for easier sharing on new devices. Then, click on Set up recovery (3).
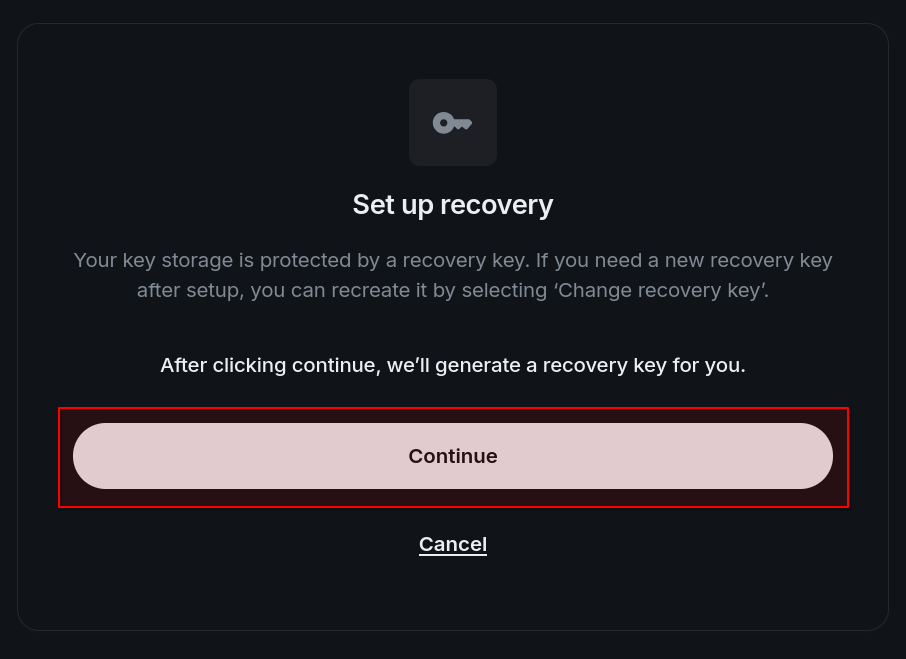
The recovery wizard will guide you through the process. Click Continue to start.
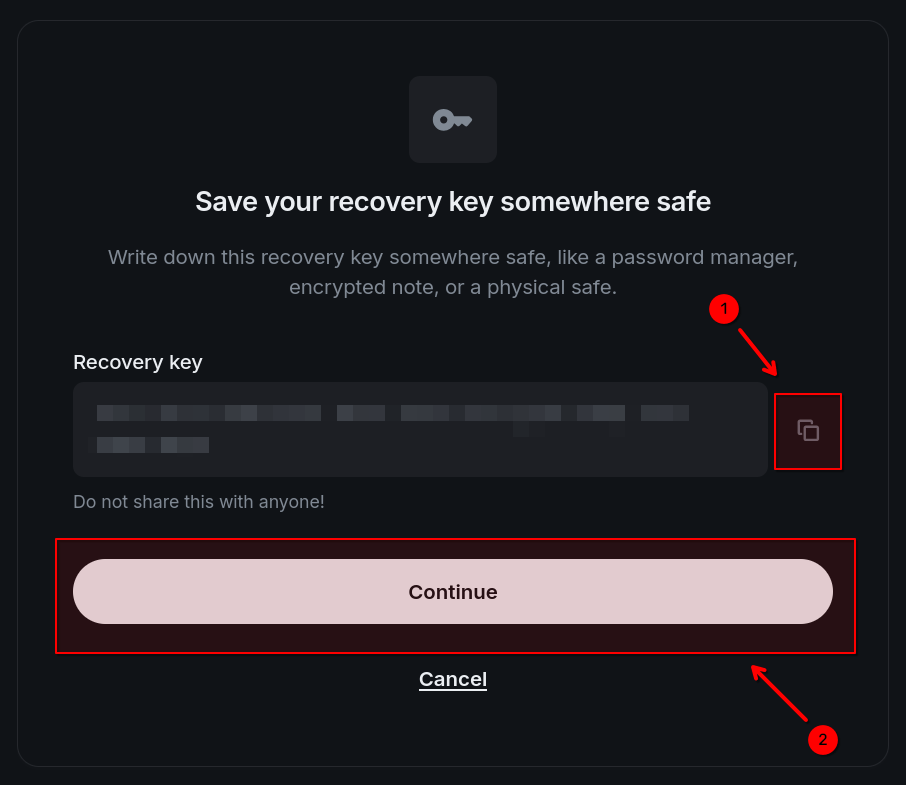
A random recovery key is generated for you, which you can copy to your clipboard by clicking on the Copy button (1). As the app notes, you should store it in a secure location, preferably a password manager.
After having done so, click on Continue (2) again.
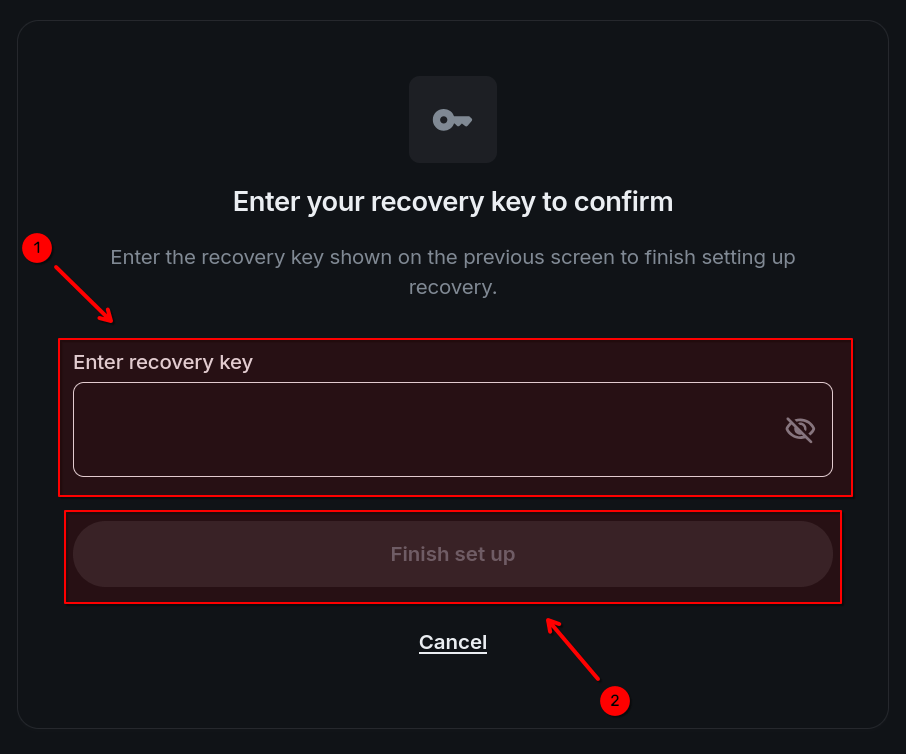
To make sure you got your recovery key noted down correctly, Element will ask you to provide it once again. Do so by pasting it into the box (1), then click on Finish set up (2) to conclude the process.
Your encryption key backup is now set up properly. The next time you’ll log in with a new client, Element will now give you the option of either receiving your encryption keys from one of your other clients—which is more convenient—or if that is not possible or undesired, to use your recovery key instead, which fetches and decrypts your encryption key backup stored on the homeserver.
Recommended clients
Aside from Element, there exist a number of other clients that can be used to interact with the Matrix ecosystem.
The following is but a small selection of personal recommendations from the digital-hub.sh team.
Desktop
Web
Use straight from your browser—no installation required.
Android
SchildiChat Next – A fork of the official Element X Android app with some additional features and fixes. Generally recommended over Element X.
Element X – The official “next-generation” Android app from Element.
fluffychat – An Android app for Matrix that focuses on simplicity and usability.
Further reading
The Matrix Docs include several basic how-to guides on using Matrix, using Element as an example.
The Element FAQs answer many common question on how to use Element.
Footnotes